
You will first need to install the NeoPixel library. This is pretty easy if you have a newer version of Arduino. If not, you should stop what you are doing right now and install the newest version of Arduino.
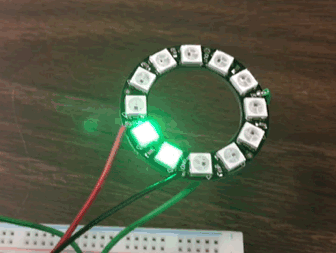
We’ve talked briefly about libraries before. This library adds a number of functions to Arduino that will work with NeoPixels. After installing the library build the circuit shown and run the code below.
![]()
// This is a modified version of the NeoPixel Ring simple sketch (c) 2013 Shae Erisson
// released under the GPLv3 license to match the rest of the AdaFruit NeoPixel library
// It was created for students at Divine Child High School

#include <Adafruit_NeoPixel.h>

// Which pin on the Arduino is connected to the NeoPixels?
#define PIN            6

// How many NeoPixels are attached to the Arduino?
// The rings we have have 12 NeoPixels
#define NUMPIXELS      12

// When we setup the NeoPixel library, we tell it how many pixels, and which pin to use to send signals.
Adafruit_NeoPixel pixels = Adafruit_NeoPixel(NUMPIXELS, PIN, NEO_GRB + NEO_KHZ800);

int delayval = 500; // delay for half a second

void setup() {
  pixels.begin(); // This initializes the NeoPixel library.
}

void loop() {

  // For a set of NeoPixels the first NeoPixel is 0, second is 1, all the way up to the count of pixels minus one.

  for(int i = 0; i < NUMPIXELS; i++){

    // pixels.Color takes RGB values, from 0,0,0 up to 255,255,255
    pixels.setPixelColor(i, pixels.Color(0,150,0));
    // Moderately bright green color.

    pixels.show();
    // This sends the updated pixel color to the hardware.

    delay(delayval);
    // Delay for a period of time (in milliseconds).
  }
}
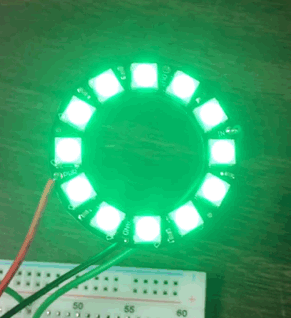
You should have seen each of the LEDs light up green one after the other and then nothing. Let’s talk about how this code works and then you can play a bit to make it do something more interesting.
When we used the Serial Library it was very easy because it is built into Arduino. For most other libraries we need a line of code like:
#include <Adafruit_NeoPixel.h>
In order use it with our sketch. We do this because every library we add uses up memory in our Arduino board. We have limited memory available so we only load libraries if we intend to use them.
The next line we need invokes the library and creates an instance called “pixels”
Adafruit_NeoPixel pixels = Adafruit_NeoPixel(NUMPIXELS, PIN, NEO_GRB + NEO_KHZ800);
Just as with variable we could use any word other than “pixels” if we wished. We could also invoke this more than once with a different name each time if we wished.
The function Adafruit_NeoPixel( ) has three arguments. The first is the number of NeoPixels (for our rings this is 12). The second argument is the number of the digital pin on our Arduino that we are using. The third argument is something about the particular “flavor” of NeoPixel we are using. If the colors don’t seem to match up correctly you should try changing the “NEO_GRB” to “NEO_RGB” but otherwise leave the rest unchanged.
In our void setup() we need:
pixels.begin(); // This initializes the NeoPixel library.
This just starts up the “pixels” object that we created above. We only need to understand two more functions and we’ll be ready to go. If we used a name other than “pixels” we’d use it here and in the functions we call below.
pixels.setPixelColor(i, pixels.Color(0,150,0)); // Moderately bright green color.

pixels.show(); // This sends the updated pixel color to the hardware.
The first line has a new function and a new variable type. As you might guess, pixels.setPixelColor() will set the color of a single NeoPixel. This function has two arguments. The first is the Pixel number and the second is the color (more on this later).
NeoPixels are numbered starting at zero. So we have 12 NeoPixels on our ring. The first would be number zero and the last would be eleven. If you’re not sure it is pretty safe to assume that most numbering in code starts at zero.
The second argument is the color we want to display. This relies on another function pixels.Color(). This function has three arguments. They are the brightness of red, green, and blue light, respectively. These are values of 0-255, just as we saw with analogWrite().
We can change the colors or turn on/off the LED’s as much as we want, but none of these changes will actually be displayed by the NeoPixels. pixels.setPixelColor() only sets the color and brightness of the LEDs. In order to show this new color we must use the function pixels.show(). If we don’t call pixels.show() we the LEDs will remain unchanged.
You must be logged in to post a comment.